


Fork biscuits are the simplest thing in British home baking: a firm, short dough rolled into balls, squashed flat with the back of a fork, and baked until the edges just colour. No rolling pin, no cutters, no chilling overnight. The whole batch takes about 30 minutes from cupboard to cooling rack.
They also go wrong in exactly one way. People make the dough too soft, the biscuits spread in the oven, and the fork marks bake out into a smooth pale disc. Everything below is built around preventing that: a 2:1:1 ratio that keeps the dough stiff, a 15-minute chill after the pressing rather than before, and an oven hot enough to set the ridges before the butter has time to melt out.
At a glance
| Detail | Specification |
|---|---|
| Makes | 18-20 biscuits at about 22g each |
| Prep | 15 minutes |
| Chill | 15 minutes, after shaping |
| Bake | 12-14 minutes |
| Oven | 170C fan / 190C conventional / gas mark 5 |
| Tins | Two flat baking trays, lined with baking parchment |
| Skill level | Genuinely beginner – the easiest biscuit there is |
| Rough cost | About £1.20-£1.80 for the whole batch, so well under 10p a biscuit |
| Keeps | 7-10 days in an airtight tin |
| Freezes | Yes – raw pressed discs for 3 months, baked biscuits for 3 months |
The 2:1:1 ratio, and why it is the whole recipe
Traditional fork biscuits run on a ratio of 2 parts plain flour to 1 part butter to 1 part caster sugar, by weight. Two hundred grams, one hundred, one hundred. Learn that and you never need the recipe again – you can scale it to whatever quantity of butter is left in the fridge.
The ratio matters because of what it leaves out. There is no liquid in it. A creamed sponge or a cookie dough carries eggs and often milk, which is why those doughs are soft and why cookies spread. Fork biscuits carry only enough moisture to bring the crumbs together, which is what makes the dough stiff enough to hold an impression through 13 minutes in a hot oven. Every gram of extra liquid you add is a fork mark you lose.
| Ratio | Flour | Butter | Sugar | Result |
|---|---|---|---|---|
| 2:1:1 (this recipe) | 200g | 100g | 100g | Firm dough, crisp snap, marks hold cleanly |
| 3:2:1 | 150g | 100g | 50g | Shorter and more shortbread-like, paler, very crumbly |
| 2:1:0.75 | 200g | 100g | 75g | Less sweet, slightly harder bite – good for chocolate dipping |
| Cookie dough for comparison | 200g | 120g | 150g plus egg | Soft, spreads, will not hold a fork mark at all |
Ingredients
| Ingredient | Metric | Imperial | Notes |
|---|---|---|---|
| Plain flour | 200g | 7oz | Plain, not self-raising – see below |
| Baking powder | 1/2 tsp | 1/2 tsp | Just enough lift to stop them being hard |
| Unsalted butter, softened | 100g | 3.5oz | Block butter, not a spreadable tub |
| Caster sugar | 100g | 3.5oz | Golden caster gives a fuller, slightly toffee flavour |
| Egg yolk | 1 medium | 1 medium | Yolk only – the white makes them tough and pale |
| Vanilla extract | 1 tsp | 1 tsp | Extract, not essence |
| Fine salt | 1/4 tsp | 1/4 tsp | Omit if using salted butter |
| Whole milk | 1-2 tsp | 1-2 tsp | Only if the dough refuses to come together |
Plain flour or self-raising?
Plain flour plus half a teaspoon of baking powder, every time. Self-raising flour in the UK carries considerably more raising agent than that, and the extra lift puffs the biscuit upwards in the oven, which is precisely what rounds off the ridges you have just pressed in. If self-raising is all you have, use it and drop the baking powder, but expect softer, more domed biscuits with fainter marks.
Butter temperature is the thing people get wrong
You want butter that is soft enough to cream but still holding its shape – roughly 30-45 minutes out of the fridge in a normal British kitchen, not two hours next to the radiator and definitely not microwaved. Greasy, half-melted butter produces a slack dough, and a slack dough spreads. If you press a finger into the block and it leaves a clean dent without the butter smearing, it is ready.
Method

- Heat the oven to 170C fan / 190C conventional / gas mark 5 and line two flat baking trays with parchment.
- Beat the butter and sugar together for about 2 minutes, until paler and just combined. Do not cream it to a fluffy mousse the way you would for a sponge – you are not trying to beat air into this.
- Beat in the egg yolk and vanilla.
- Sift in the flour, baking powder and salt. Work it in with a wooden spoon and then your hands until it forms a firm, slightly crumbly dough. It should feel like soft marzipan and hold together when squeezed. If it will not come together at all, add milk half a teaspoon at a time.
- Weigh the dough into 22g pieces (about 20 of them) and roll each into a smooth ball between your palms. Weighing sounds fussy for a biscuit, but even sizing is the difference between a whole tray being ready at once and half of it catching.
- Space the balls at least 5cm apart on the trays – they spread a little even when you do everything right.
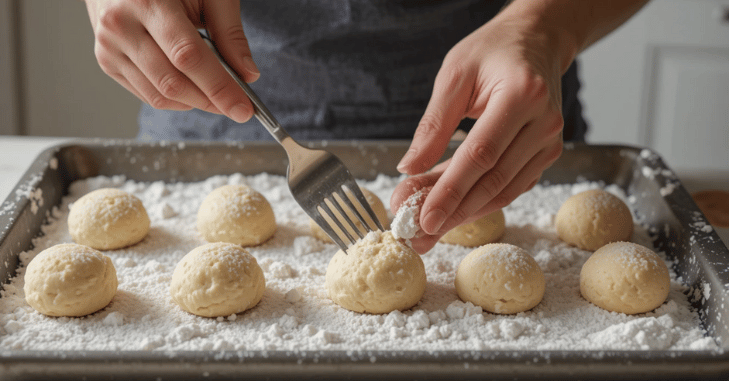
- Dip a fork in cold water or cold milk, shake off the excess, and press each ball down to about 1cm thick. Re-dip the fork every two or three biscuits. Press once, firmly, and do not go back over it.
- Chill the pressed biscuits, on their trays, for 15 minutes in the fridge. This one step does more for the fork marks than anything else.
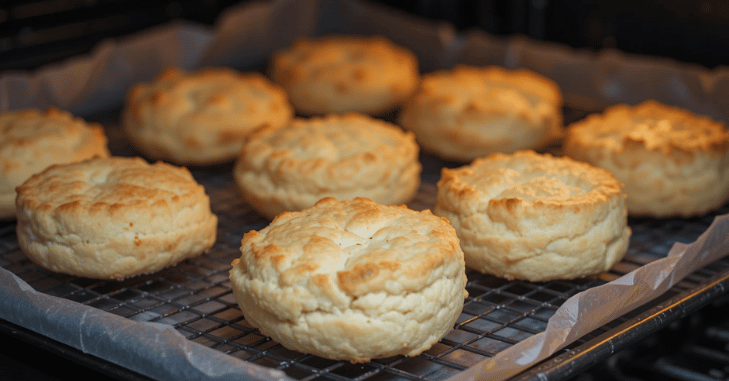
- Bake for 12-14 minutes, swapping and rotating the trays at 8 minutes, until the edges are just turning gold and the centres still look slightly underdone.
- Leave them on the tray for 5 minutes – they are fragile straight from the oven – then move to a wire rack. They crisp as they cool.
How to get the fork marks to actually hold
Six specific things, in rough order of how much difference each makes.
- Chill after pressing, not before. Chilling the bulk dough makes it too hard to press cleanly. Chilling the pressed discs sets the butter inside the ridges so they hold their shape while the oven does its work.
- Keep the dough dry. Egg yolk rather than whole egg, and milk only as a last resort.
- Wet the fork, do not flour it. Water or milk stops the sticking without leaving white streaks. Flour on the fork bakes into pale dusty lines.
- One firm press. Pressing twice smears the ridges together. If a biscuit goes wrong, re-roll that ball and start it again.
- Do not press too thin. Below about 8mm the ridges have nothing underneath them to sit on and they flatten out in the heat.
- Use a proper hot oven. 170C fan sets the outside quickly. A cooler oven gives the butter time to melt and run before the structure sets, and the marks go with it.
Five variations that work with the same base dough
| Variation | What to change | Bake time |
|---|---|---|
| Chocolate | Replace 25g of the flour with 25g cocoa powder and add 1 tsp milk. Cocoa is drying, so the dough needs it back. | 12-13 minutes |
| Lemon | Add the finely grated zest of 2 unwaxed lemons with the sugar. Drizzle with icing made from 60g icing sugar and 1 tbsp lemon juice once cool. | 12-14 minutes |
| Ginger | Add 2 tsp ground ginger and 1/2 tsp mixed spice, and swap 25g of the caster sugar for light soft brown sugar. | 12-14 minutes |
| Almond | Replace 40g of the flour with 40g ground almonds and add 1/2 tsp almond extract. Press half a blanched almond into each biscuit instead of using a fork. | 13-15 minutes |
| Chocolate chip | Fold in 75g of small chocolate chips at the end. Chips only – chunks push the ridges apart. | 13-14 minutes |
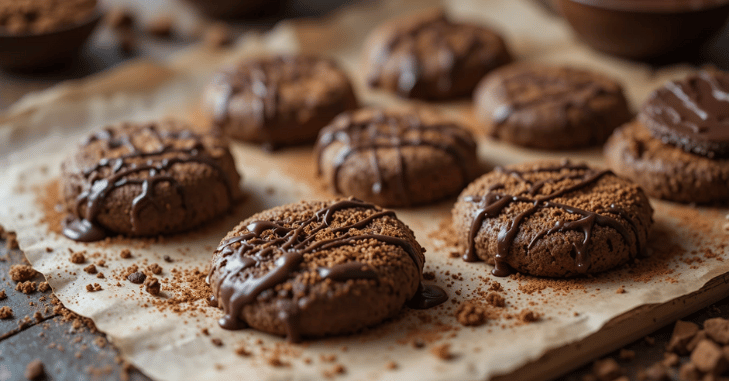
For a finishing touch, dip half of each cooled biscuit in 100g of melted dark chocolate and set them on parchment. If you enjoy this kind of simple tin-filler, the same instincts apply to Linzer cookies, which use a similar short dough with ground nuts and a jam centre.
Baking with children
Fork biscuits are close to the ideal first baking project, because the two jobs children actually want to do – rolling balls and squashing them – are the two jobs that matter, and neither involves a hot oven or a sharp blade.
- Let them roll the balls slightly larger and press slightly thicker; the biscuits will be a little softer and no worse for it.
- Give them a second implement to try: a potato masher gives a grid, and the tines of a smaller cake fork give a finer pattern.
- Hundreds and thousands pressed into the surface before baking stay put; sprinkles added after need icing to hold them.
- Roll the dough thicker and use a small cutter if the fork idea does not take – the dough is forgiving either way.
- Warn them not to eat much raw dough. Raw flour, not just raw egg, can carry bacteria, which is why the advice is to keep it out of small hands.
What goes wrong, and the fix
| Problem | Cause | Fix |
|---|---|---|
| Fork marks disappeared and the biscuits are smooth | Dough too soft, butter too warm, or no chill after pressing. | Chill the pressed discs for 15-20 minutes. In a hot kitchen, chill the trays for 30. |
| Biscuits spread into one another | Too much butter or sugar for the flour, or trays too close together. | Weigh the ingredients rather than using cups, and space the balls 5cm apart. |
| Fork sticks and drags the dough | Dry fork against a sticky dough. | Dip the fork in cold water or milk between every couple of biscuits. |
| Dough will not come together, just crumbs | Slightly too little moisture, or very absorbent flour. | Add milk 1/2 tsp at a time. Stop the moment it holds when squeezed. |
| Rock hard biscuits | Overbaked, or the dough was kneaded like bread. | Take them out while the centres still look pale and soft. Work the flour in only until it disappears. |
| Pale, soft and cakey | Oven too cool, or self-raising flour plus baking powder. | Check the oven with a thermometer – many domestic ovens run 10-15C under. Use plain flour. |
| Burnt bottoms, raw tops | Dark or thin trays, or the shelf sitting too low. | Bake in the middle of the oven on a heavy, light-coloured tray, doubled up if yours is flimsy. |
Storage and freezing
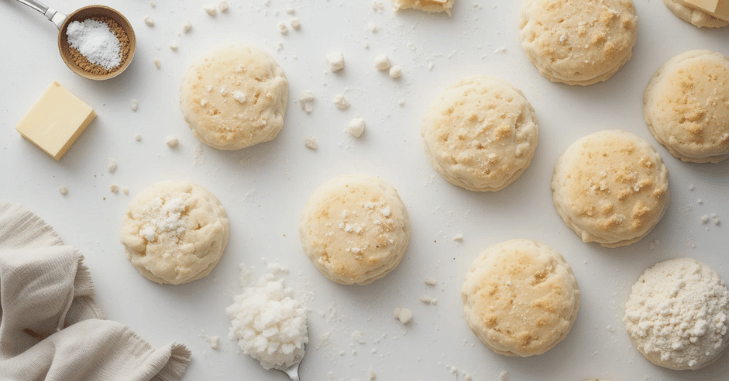
- In a tin: completely cool first, then layer with baking parchment in an airtight tin. They keep crisp for 7-10 days.
- Never store them with cake, flapjack or soft biscuits. Moisture migrates from the soft thing to the crisp thing and you lose the snap within a day.
- Gone soft? Refresh in a 150C fan oven for 3-4 minutes and cool completely on a rack.
- Freeze raw: press the discs, freeze them on a tray until solid, then bag them. Bake straight from frozen and add 2 minutes.
- Freeze baked: up to 3 months in a sealed container. Defrost at room temperature for an hour.
- Dough in the fridge: the unshaped dough keeps 3 days wrapped, but let it come back to cool room temperature before rolling or it will crack.
Ingredient notes and rough UK costs
Everything here comes from a standard supermarket baking aisle, and it is cheap baking – a batch of 20 works out at roughly £1.20 to £1.80 at own-label prices, which is a fraction of what the equivalent tin of shop-bought biscuits costs.
- Butter: a 250g block of own-label British butter typically runs a little over £2, and you need less than half of it. Do not substitute a spreadable tub – the added water and vegetable oil will slacken the dough badly.
- Caster sugar: ordinary white caster is standard; golden caster costs slightly more and gives a warmer, faintly caramel flavour. Granulated is too coarse and leaves a gritty texture.
- Plain flour: the cheapest own-label bag is fine here. Fork biscuits are not a recipe where a stoneground artisan flour earns its money.
- Vanilla: buy extract rather than essence. It costs more per bottle but it is the only flavour in a plain fork biscuit, so it is worth it.
- Gluten free: a plain gluten-free flour blend plus 1/4 tsp xanthan gum works, though the dough is more fragile – chill it for 30 minutes after pressing.
Serving them properly
Fork biscuits are a tea biscuit, not a dessert. They are firm enough to dunk without collapsing, which is more than can be said for most home-baked biscuits, and their plainness is the point – they sit alongside a strong cup of tea rather than competing with it.
They are also useful in ways a softer biscuit is not: crushed into a crumb base, layered with cream and fruit into a quick fridge cake, or served on the side of something warm and sweet. If you are putting on a full spread, they slot neatly next to a warm apple crumble or a proper bread and butter pudding, both of which need something crisp on the plate to work against. And if you are baking your way through the British classics, a reliable Yorkshire pudding is the savoury equivalent – another recipe where the technique matters far more than the ingredient list.
All you need to create basic biscuits is butter, sugar, and self-raising flour; however, you can add a little vanilla for flavor. If you like, you can use ordinary flour and add a small amount of baking soda or powder to give the cookies a remarkable rise.
Freeze: Both baked and unbaked biscuits freeze wonderfully. To prevent them from sticking together, let them cool thoroughly before opening, or freeze them on a tray until they solidify.
Because they are made by dropping them onto a baking sheet directly from the bowl in which they are prepared, they are known as drop biscuits.

